Interfacing accelerometer with arduino uno
Introduction:
In this post, we are going to interface accelerometer with arduino. Accelerometer is a sensor used for detecting motion or change in coordinates. We have three coordinates i.e X, Y and Z axis. It's a five-pin device out of which are for power supply Vcc and Ground. The output of the sensor is in analog.
This sensor required three analog pins. We can provide Vcc and ground directly from the analog pins.
So, we are using five analog pins. Three for axis and two for providing power to the module.
Components required:
- Arduino Uno
- ADXL335 (accelerometer)
- USB type B cable for interfacing with computer.
Connections:
Make connections as follows:
ADXL335 Arduino
Vcc A0
X A1
Y A2
Z A3
The program is quite simple. We are using adc for reading the values of X, Y and Z axes.
Also, the adc value is in raw format means its value ranges from 0 to 1023.
No need to manipulate the raw adc value.
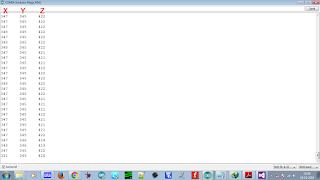
Once, we get the raw values of adc, we will fed it to serialprint function to check its output through serial monitor.
Application of accelerometer:
Used in smartphones for motion detection and orientation sensor. It found enormous application in
motion sensing game consoles. In case of robotics, we can use it for hand gesture based robot or to synthesize the hand gesture into voice.
Source code:
// these constants describe the pins. They won't change:
const int groundpin = A4; // analog input pin 4 -- ground
const int powerpin = A0; // analog input pin 5 -- voltage
const int xpin = A1; // x-axis of the accelerometer
const int ypin = A2; // y-axis
const int zpin = A3; // z-axis (only on 3-axis models)
void setup() {
Serial.begin(9600);
pinMode(groundpin, OUTPUT);
pinMode(powerpin, OUTPUT);
digitalWrite(groundpin, LOW);
digitalWrite(powerpin, HIGH);
}
void loop() {
Serial.print(analogRead(xpin));
Serial.print("\t");
Serial.print(analogRead(ypin));
Serial.print("\t");
Serial.print(analogRead(zpin));
Serial.println();
delay(100);
}
| Output from serial monitor of arduino |
Thanks for viewing this post.

No comments:
Post a Comment